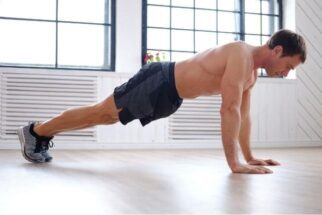
Would you like to start with your push-up routine, but you are still unable to do 1 whole push-up yet?
Fortunately, this is why progressions are so important!
It doesn’t matter what level you are starting out with; you will always have a progression available for the current strength you have.
In case you haven’t seen the article on how to start your calisthenics program for beginners, check it out here.
So What Is A Progression?
It’s just a way of gradually building up the strength for a specific exercise. In this case, the Push-Ups.
What To Consider With Any Progression?
Posture is the name of the game!
In every progression mentioned in this article, make sure to keep the right posture since it is more important than repetitions. Want to avoid injuries? Make sure your posture is always right!
What Is The Correct Posture For Any Push Up Progression?
1. Hand Posture
- Your hands should be shoulder width apart. In other words, if you are lying down on the floor, your thumb should be just outside your chest.
- Your hands should be facing slightly outwards. If they are facing inwards, your elbows flare outside, but if your hands are facing outwards, your elbows flare inside. Your elbows should open up around 45 degrees.
Here is an example of the WRONG positioning.

Hands are not shoulder-width apart; they are way to open.

Hands are facing inwards which makes the elbows flare outside.
Here is an example of the CORRECT positioning.

Hands are slightly facing outwards to get a 45-degree angle on the elbow.

Hands are shoulder-width apart.
2. Back Posture
Try to go keep it as straight as possible!
Don’t lag or curved it. That’s it.

Curved Back

Straight Back
So now that we have the basics covered. Let check out the 3 progressions you can start with.
1. Elevated Push Ups

You can do an elevated push up against a wall, a chair, a bench, a table, or anything you have available in your surroundings.
When elevating the hands, you are carrying less weight but at the same time you are starting to create muscle memory and even some muscle to get stronger while you prepare for the next progression.
The higher your hands are, the easier it is because you are carrying less weight.
So you can do the following:
- You can start with a wall – the height of your chest
- Go down to a table – height of your waist
- Reach a bench – height of your knees
This will increase the difficulty until you are almost ready to try on the floor.
2. Knee Push Ups

When you reach the floor, if you are not ready to do regular push-ups, try with your knees on the ground.
You can put a towel, mat, pillow, or something that protects your knees because this is usually a spot that many people complain about. Even though you may have the strength in your arms, the knees hurt. So make sure you take care of your knees.
3. Negative Push Up
Doing negatives with any exercise is always one of the best ways to progress. You build up enough strength and endurance to replicate the exercise you are trying to accomplish.
What Is A Negative Exercise?
The easiest way to explain it is to think of it as the part of the exercise in which gravity helps you.
So if you are doing a push-up, the push movement is a positive movement, but when you are lowering to the floor, it is the negative movement.
The same with pulling movement. When you are pulling, you are doing the positive movement, when you are going down, the negative movement.
As you see, this part of the exercise is easier because you only have to resist your weight, you don’t have to generate force to go against gravity and your weight.
So what you would need to do is get in a regular push-up position, take 3 – 5 seconds to lower down, and then get up with your knees.
4. Regular Push Up

Are you ready to push yourself from the floor?
You already have the correct posture; you have the negative strength; it’s only a matter of time you develop the strength to push all your body from the ground!
If you can do at least 10 negative push-ups, you are probably ready to embark on your first push-up.
Ready, set, go!
